why rising earth?

The title of this blog draws from my time as an apprentice at the Cob Cottage Company in costal Oregon. If you spend time with natural building folk, you'll eventually find yourself around a fire, sing silly songs about cob and natural building. Folks usually refer to these oftentimes improvised tunes as "cobsongs". I often sang..."There is a house in old coquille, they call the rising earth, it's been the work of many hands, and you know what that's worth..."

Thursday, June 23, 2011

kitchen coming along..


Here are a few photos of the Food Literacy Project's outdoor kitchen, on Oxmoor Farm in Louisville, KY. It's built on the foundation of the farm's old milk shed. I repaired the concrete last winter, began the framing early in the year, and the kitchen details came together this spring. This project was very much a group effort, with great volunteers, FLP staff, and farmers helping throughout.
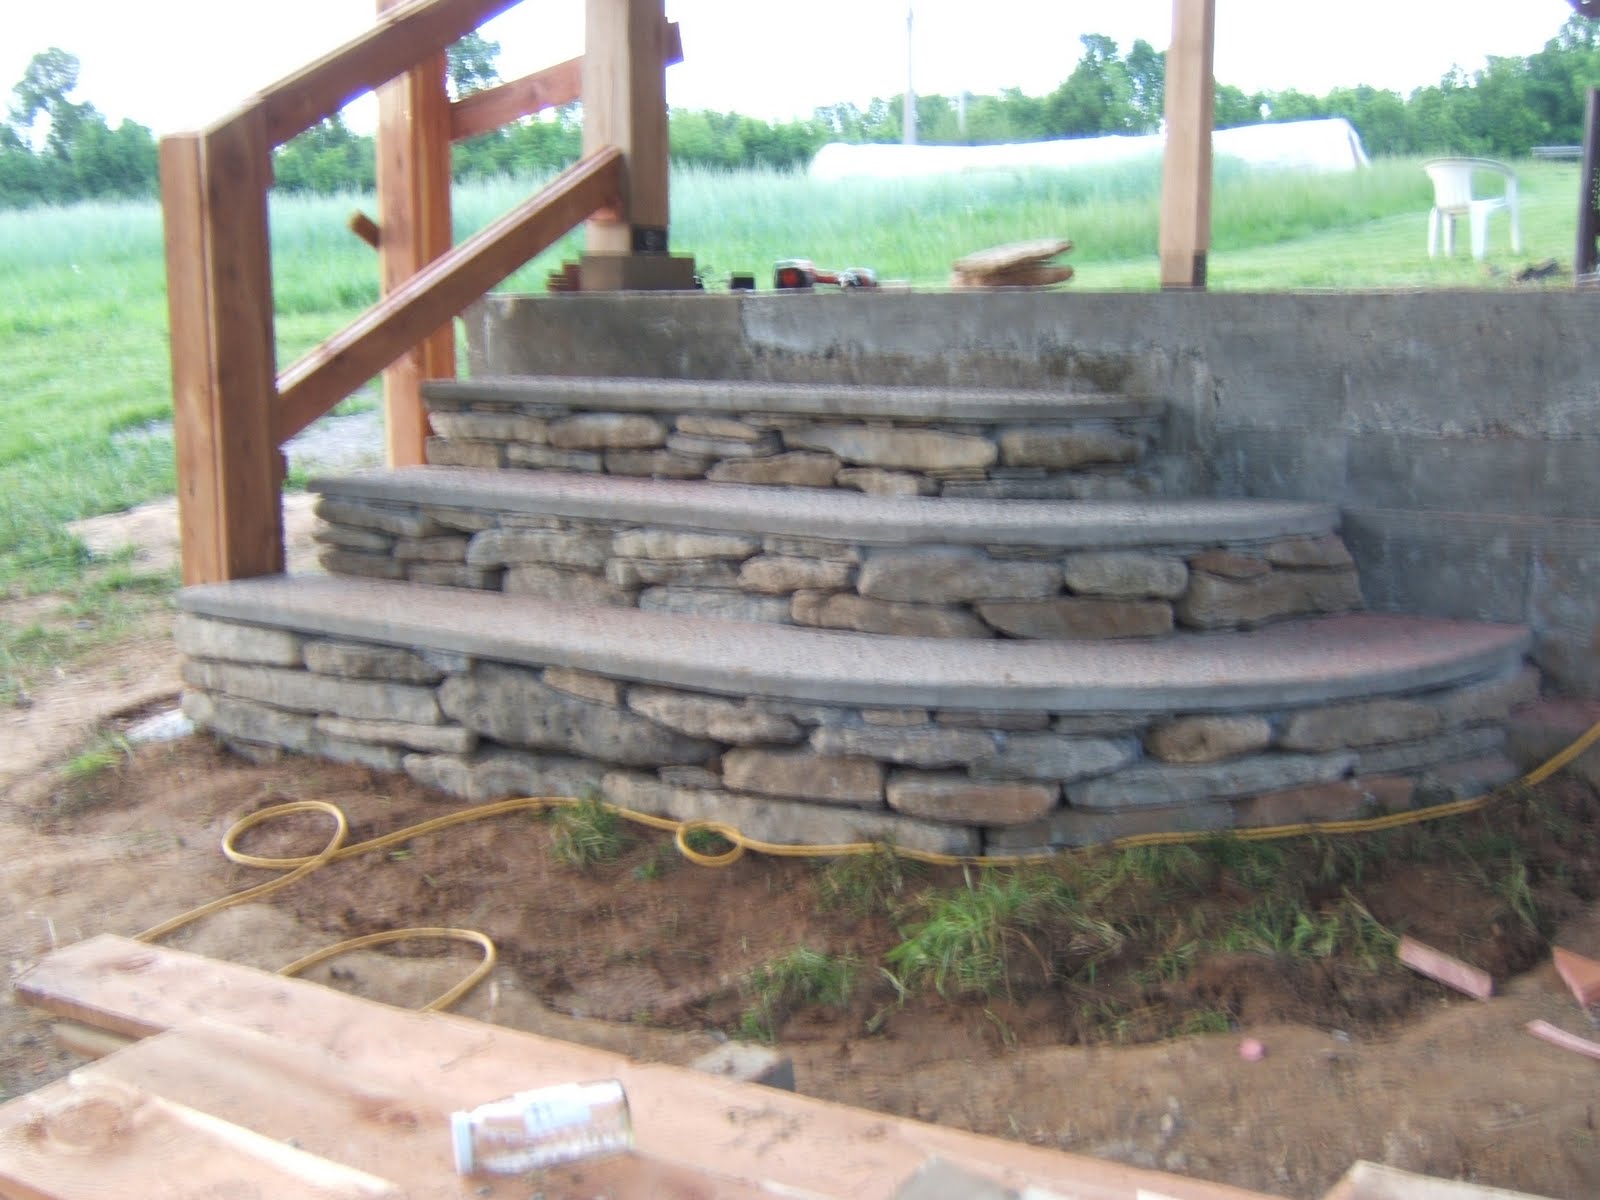


This is the stone staircase, which was great fun to build. I'll do a detailed post on building the stairs soon and include the concrete stairs we just poured at the house in Durham.


Here you can see different wood species used in the kitchen. Standing out is the eastern red cedar I used for the cabinets, stairs and railings. The heavy timber posts and beams are white oak, and the roof framing, which you can see below is yellow poplar. All three woods were produced by family run sawmills in central KY. The only bit of pressure treated pine used was for the stair stringers. Unfortunately I had no choice, I couldn't find a good alternative in time. Rot resistant 2x12's are hard to come by.


I put my Dad to work while my family was visiting us in Louisville. He's a great tinkerer/builder guy and built many of the cabinets in the house I grew up in. His first job on site was spending a couple hours transforming a rusty tablesaw from the farmhouse porch into a working tool again. Then he helped me get started building the cabinets.


Many people helped throughout this project. Here is part of the FLP crew working on the brick floor.


Tuesday, March 8, 2011

Update

So these pictures are in reverse from the rafters down. The posts, beams, and braces are a mix of white and red oak. White oak is much more decay resistant than red, so the most exposed pieces (the west side mostly) are white. The roof framing is tulip poplar, which is plentiful around here and has similar strength characteristics as pine. All the lumber is full dimension. 6x6 posts and beams, 4x4 braces, 2x6 rafters.


The tie beam is notched to lap over the long beam to resist rafter thrust. Because I didn't use a structural ridge beam, the rafters want to fall and spread the "walls". I had some numbers run by an engineer, and am confident that the three tie beams are sufficently strong to resist rafter thrust. Check out Jack Sobon's "Historic American Timber Jointry" for an example of this simple method.


I toe-screwed 6" timberlocks here and through the plate into the rafters. I used 4" and 6" for the braces, 4" in the rafters at the ridge.


I appreciate help when I get it, and I sure needed help lifting the beams. Here Nathan and John are cutting post housings in the beam.


I imagine the next time I build something like this I will do real timber jointery, hopefully I'll have the time. I housed the posts into the beams to keep checks in line, to prevent the posts from twisting as they dry, and mostly because the beams are so rough cut and weird, I needed to create a level bearing surface myself.


Sunday, January 16, 2011

New wall with the new year


I formed this up after Christmas and poured the two last days of the year. It had been cold and frozen for weeks, putting this concrete work on hold. Luckily it warmed up and I got just a long enough window of about three days to pour and most importantly, cure the concrete. I went to the site New Year's morning to cover and insulate the wall, it was going to get cold again that day and I didn't want it to freeze too soon. I covered it with plastic and a lot of straw.


Tuesday, January 4, 2011

Kitchen Framing

Here is my working plan for the kitchen framing at this point. More to come soon.

Monday, December 6, 2010

Kitchen 'Crete


After months of scheming, planning, and mostly being occupied by other responsibilities at work, I've finally begun actual work on the outdoor kitchen at Oxmoor Farm. Last Friday with the help of Kitty and Adam, I poured the footing for the foundation repair.


You can see that the foundation rests on bedrock, which is limestone here in central KY. The channels and holes in the stone were created by both water and plants. Limestone is primarily calcium carbonate and is soluble in slightly acid conditions, such as groundwater. I had to root out three large honeysuckle bushes that had grown out of the foundation, and were likely the cause of it's damage. The roots twined down the channels you can see in the picture and dove down through tiny cracks in the stone, secreting organic acids which dissolve the limestone and allow the plants to absorb the minerals.


Securing the forms was a little challenging because the extra thin topsoil made it impossible to drive stakes in the ground. I had to brace the forms with the dirt I excavated, and luckily it was enough support.


The straight form boards left gaps between themselves and the bedrock which I filled with stone and packed soil outside the form to prevent concrete seepage. I also installed a drainage system towards the inside of the wall to get rid of water that may build up inside the wall.


Here are Kitty and Adam, helping with the pour while I ran the mixer.


After the concrete was placed, I let it cure for a few hours and touched it up with a steel trowel. I stuck in some rebar, roughed up the surface to adhere to the next pour, scratched the date in a section that will be exposed, and covered it with plastic and straw because the forecast called for freezing temperatures. Concrete can't be allowed to freeze for some time after it's poured, but I think it will be ok because it's in contact with the ground which hasn't frozen, the curing of concrete is an exothermic chemical reaction which creates heat, and it's covered in insulation. Stay tuned, I hope to complete the concrete work this week, if the weather get's out of the 20's! (it should be in the 40s by weeks' end)

Monday, November 15, 2010

cob oven

I haven't posted in over a year, so I suppose an update is due. I've done some building since my last posts, although I don't have pictures of much. I worked on the foundation and framing of a strawbale building in rural Kentucky, did some residential remodeling, and re-plastered the strawbale at Bonnaroo. One thing I have pictures of is the cob oven I built this summer on a farm. It's my first one and I'm pretty happy with how it turned out. It functions really well, and I've enjoyed a number of great meals with elementary school students, who visit the farm on field trips. Best pizza in Louisville.


The oven is at the site of my next project, the outdoor kitchen at the Food Literacy Project, located on historic Oxmoor Farm in Louisville, Kentucky. The materials for the oven were completely free. I salvaged the lumber from an abandoned arbor. The clay and stone were taken from the site. gravel and sand were found in small piles outside a barn, covered in a few years growth of pokeweed and thistle. I used loose straw from the barn floor in the cob and dried grass in the plaster. The fire brick was taken from an earlier attempt at an earthen oven that was built a few years ago and never really worked. Metal roofing and screws were donated by home depot, along with 6 bags of quickrete, but didn't end up using it. I tamped the posts in gravel to facilitate drainage.

I am about to begin building a post and beam outdoor kitchen on an old foundation about 6 yards from the oven, I'll upload some pictures soon.

Thursday, October 1, 2009

Cob Cottage Update


Cob lends itself to massive walls and curved forms. The space it creates feels radically different from what most of us are used to, yet it's so familiar and seems more sheltering. You can't tell from a photo, but the quality of light that passes through a thick wall is also quite different...notice the soft curves and illumination of the window reveals.

On a technicial note, the shelves on the left of the photo hadn't been installed when this picture was taken but you can see the roundwood buried in the wall they will attach to. This methold of attachment was used all over the cottage with the windows, door frame, and roof framing all being anchored by such "deadmen". Also note what the mud daubers left while the building was open and drying for the summer, quite fitting for a mud building!

I traveled back to Chapel Hill in September to help Greg coordinate the finish plaster and pour the earthen floor. We did the interior plaster in one day with a few volunteers, then the floor, and the exterior plaster the next weekend. It was a very busy week and we got a lot accomplished.


Our plaster was a mix of local clay slip (a thick suspension of nearly pure clay in water), sand, and horse manure. The ratios were something like 1:2:1/2 respectively by volume, but don't obsess over numbers. You go by feel more than anything else and your local materials are certainly quite different. An earthen plaster should be very sandy or it will likely crack. It should not feel too sticky but should hold together in your hand. The horse manure was added for tensile strength, as it is pretty much completely fiber.

A properly finished earthen floor is hard and durable, but we decided that a partial brick floor near the door and stove would be appropriate. Aside from functioning as a sort of landing and hearth space the brick added visual and textural interest while complimenting the stone nicely.


Our mud hut even has electricity!


Pouring the earthen floor.


We mixed our material in a wheelbarrow with a hoe, although for a job of much larger size I would use a mortar mixer. We carried the mix in buckets, spread it on the subfloor and troweled the surface flat. The floor received much subsequent hard troweling as it dried over the next few days.


Greg with the last of the mix.


Once fully dry, after maybe 6 weeks, a treatment of linseed oil and beeswax will serve to harden and waterproof the floor.