It's funny that I have a blog because I'm not much of a computer guy really. But today Greg reminded me of the You Tube video of us working on the Pickards Mountain cottage in Chapel Hill in 2009. It's approaching 200,000 views, and if you do a search for cob on the site, it's the very first video to pop up. I hope you enjoy the video and take it with a grain of salt. I never imagined so many people would hear what I had to say that afternoon. A few years down the road, I don't know where I got that "over half the people in the world live in earthen buildings" bit, although It's probably not too far from the truth.
Monday, September 19, 2011

Saturday, September 10, 2011
Introducting 606 Carlton Ave.
My work since May has been helping my good friend Greg build a house for his parents in Durham, NC. This is an urban infill project, on a site in a downtown neighborhood that has been empty since the 60's when the original house burned down.

The project is happening in two phases, with the first third of the house being built and largely completed before we begin the rest. This first part contains the kitchen, bathroom, informal eating/transition space, and back deck. To the front of the house, we will be adding a living room, two bedrooms, and mudroom/entry room later on. The first phase is built mostly conventionally, with a concrete foundation, stud framed walls, and a metal roof. Nothing too unusual...except for the earthen floors, clay and lime plasters, ferrocement shower, and handmade hardwood cabinetry. Here are a few photos of what we've been up to this summer, hopefully I'll manage to get some more photos up soon.

The house will have a fair amount of concrete details, such as this threshold. It's a wonderfully flexible material that will contrast with the natural materials and give the house a more modern feel.

Here is our finish plaster test wall. The plasters are composed of varying amounts of clay, lime, and sand. Some contain finely chopped straw. We'll watch for cracks, weathering, and test hardness and dustiness before choosing our mix.

Saturday, August 6, 2011
Blogaroo!!

2011 was an exceptional Bonnaroo for me, and I think the entire "tribe" building group would feel the same way as well. This was my third year working for the Visual Design team and my focus was on building a log framed shade structure between the strawbale post office and the solar stage. The project was a blast, although stressful at times with the looming deadline...We had to build this thing in a few days and it had to be completely finished, safe, and beautiful.


 We worked from 8am until at least 9pm for about five days. My first full day we came up with a completed design in the morning, and got to work butchering trees that had fallen over the past year. The bamboo for the shade lattice was the only living material we harvested. We had a truly great crew, many folks returning to help plus a few new and much appreciated additions to the team. Hopefully I'll have the time to update this into a fuller, more informative post before long.
Thursday, June 23, 2011
kitchen coming along..

Here are a few photos of the Food Literacy Project's outdoor kitchen, on Oxmoor Farm in Louisville, KY. It's built on the foundation of the farm's old milk shed. I repaired the concrete last winter, began the framing early in the year, and the kitchen details came together this spring. This project was very much a group effort, with great volunteers, FLP staff, and farmers helping throughout.
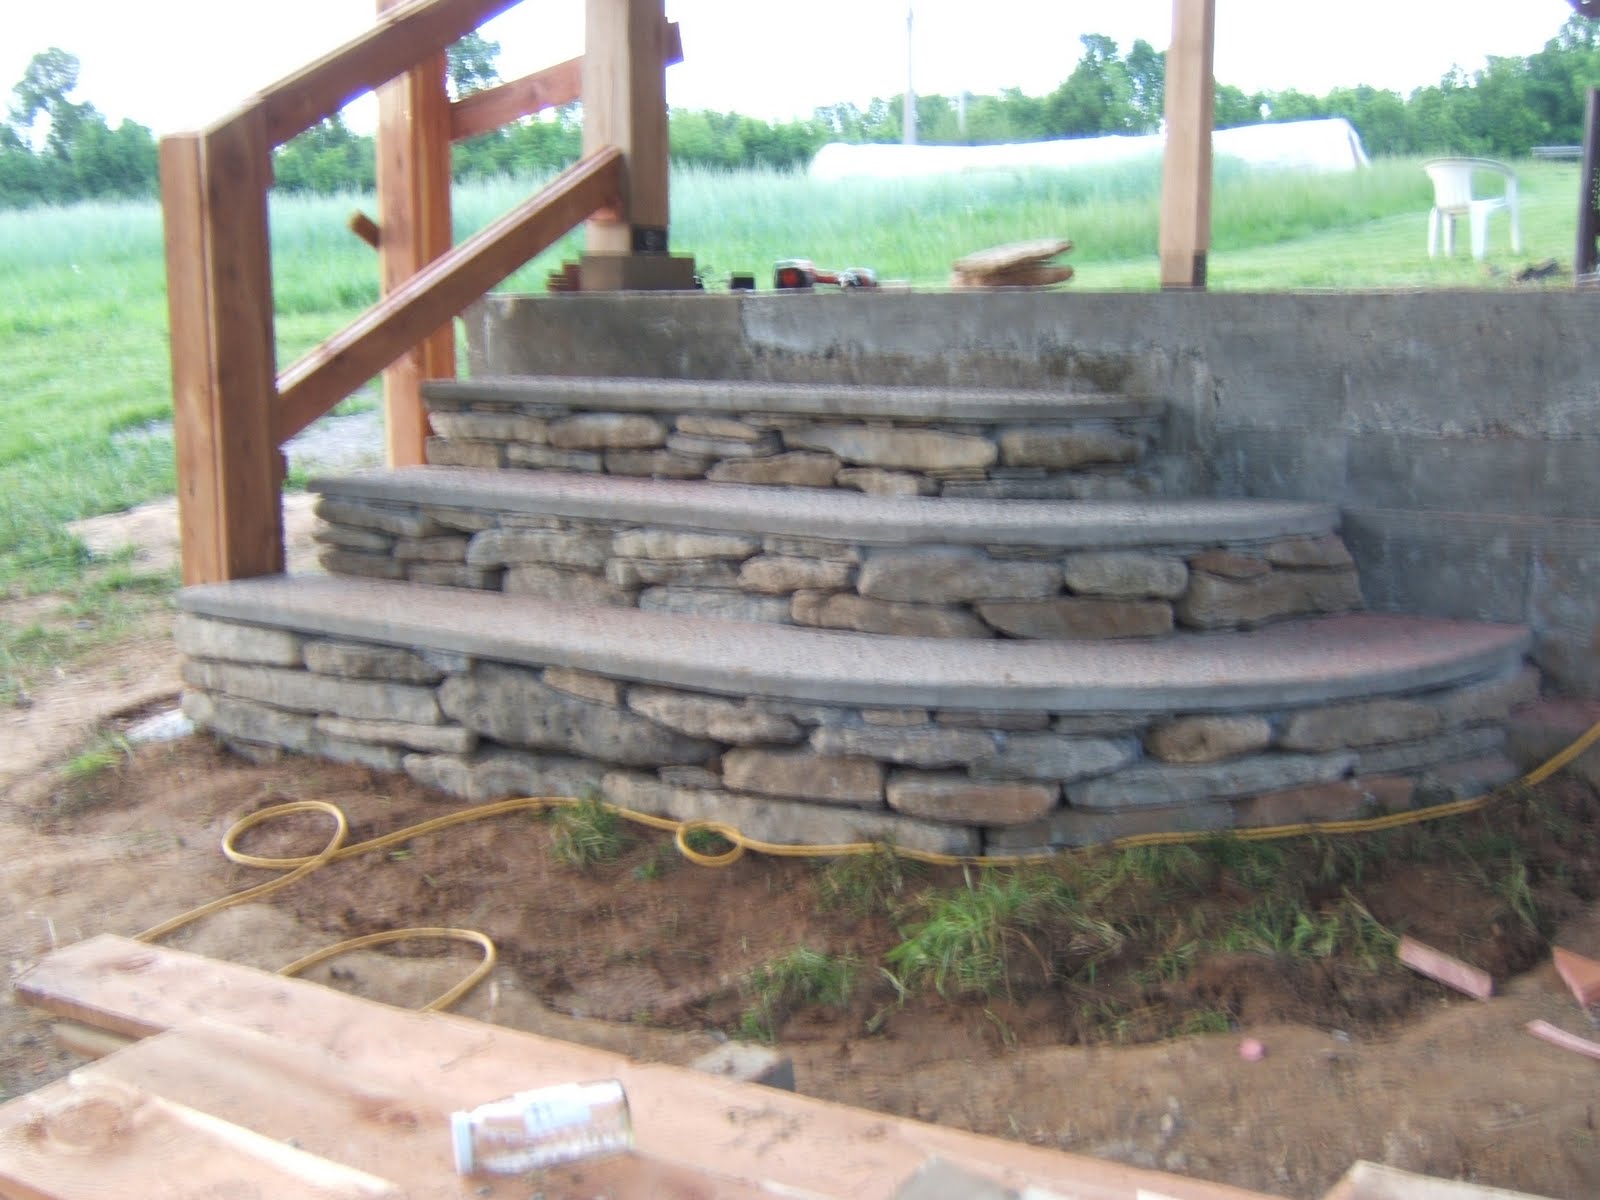
This is the stone staircase, which was great fun to build. I'll do a detailed post on building the stairs soon and include the concrete stairs we just poured at the house in Durham.


Here you can see different wood species used in the kitchen. Standing out is the eastern red cedar I used for the cabinets, stairs and railings. The heavy timber posts and beams are white oak, and the roof framing, which you can see below is yellow poplar. All three woods were produced by family run sawmills in central KY. The only bit of pressure treated pine used was for the stair stringers. Unfortunately I had no choice, I couldn't find a good alternative in time. Rot resistant 2x12's are hard to come by.

I put my Dad to work while my family was visiting us in Louisville. He's a great tinkerer/builder guy and built many of the cabinets in the house I grew up in. His first job on site was spending a couple hours transforming a rusty tablesaw from the farmhouse porch into a working tool again. Then he helped me get started building the cabinets.

Many people helped throughout this project. Here is part of the FLP crew working on the brick floor.


Tuesday, March 8, 2011
Update
So these pictures are in reverse from the rafters down. The posts, beams, and braces are a mix of white and red oak. White oak is much more decay resistant than red, so the most exposed pieces (the west side mostly) are white. The roof framing is tulip poplar, which is plentiful around here and has similar strength characteristics as pine. All the lumber is full dimension. 6x6 posts and beams, 4x4 braces, 2x6 rafters.


The tie beam is notched to lap over the long beam to resist rafter thrust. Because I didn't use a structural ridge beam, the rafters want to fall and spread the "walls". I had some numbers run by an engineer, and am confident that the three tie beams are sufficently strong to resist rafter thrust. Check out Jack Sobon's "Historic American Timber Jointry" for an example of this simple method.

I toe-screwed 6" timberlocks here and through the plate into the rafters. I used 4" and 6" for the braces, 4" in the rafters at the ridge.


I imagine the next time I build something like this I will do real timber jointery, hopefully I'll have the time. I housed the posts into the beams to keep checks in line, to prevent the posts from twisting as they dry, and mostly because the beams are so rough cut and weird, I needed to create a level bearing surface myself.


I toe-screwed 6" timberlocks here and through the plate into the rafters. I used 4" and 6" for the braces, 4" in the rafters at the ridge.


I appreciate help when I get it, and I sure needed help lifting the beams. Here Nathan and John are cutting post housings in the beam.

I imagine the next time I build something like this I will do real timber jointery, hopefully I'll have the time. I housed the posts into the beams to keep checks in line, to prevent the posts from twisting as they dry, and mostly because the beams are so rough cut and weird, I needed to create a level bearing surface myself.


Sunday, January 16, 2011
New wall with the new year

I formed this up after Christmas and poured the two last days of the year. It had been cold and frozen for weeks, putting this concrete work on hold. Luckily it warmed up and I got just a long enough window of about three days to pour and most importantly, cure the concrete. I went to the site New Year's morning to cover and insulate the wall, it was going to get cold again that day and I didn't want it to freeze too soon. I covered it with plastic and a lot of straw.


Tuesday, January 4, 2011


Subscribe to:
Posts (Atom)